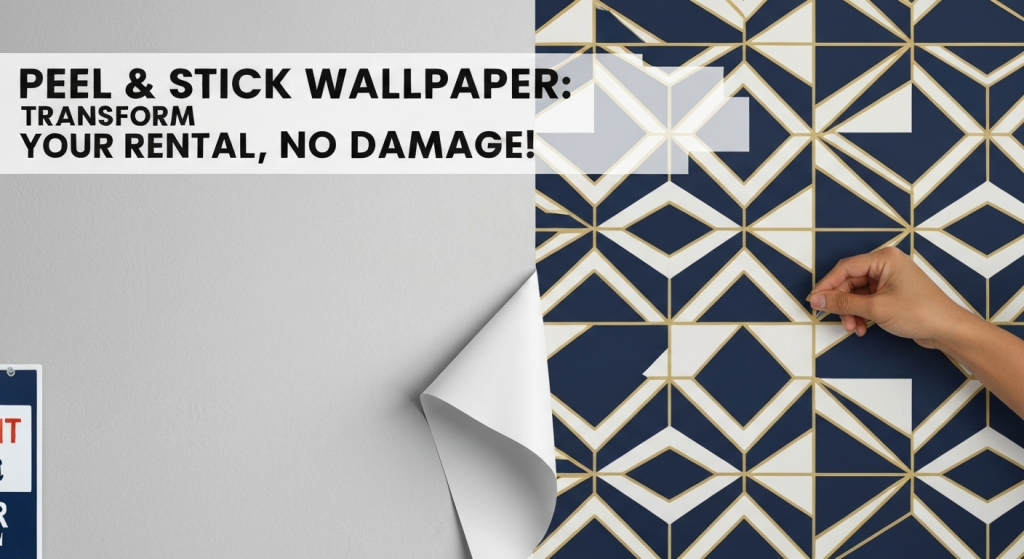
Tired of staring at those bland, boring walls in your rental? Or maybe you own your home but cringe at the thought of committing to a permanent pattern you might dislike in a year. The good news is you don’t have to settle for a space that doesn’t feel like you. Peel-and-stick wallpaper is the game-changing design tool that offers a stunning transformation without the commitment, mess, or potential loss of your security deposit. It’s a powerful way to inject personality into any room, and the best part is, you can do it all yourself.
For years, I’ve seen people hesitate to personalize their homes because they were worried about making a mistake or doing something permanent. My name is William Johnson, and my passion has always been exploring how we can make our living spaces a true reflection of ourselves, without needing a huge budget or a professional crew. I’ve spent countless hours researching design history, testing different materials, and helping people find clever, accessible solutions. This journey has shown me that peel-and-stick wallpaper is one of the most versatile and empowering products for anyone looking to create a home they love, one removable panel at a time.
What Exactly Is Peel-and-Stick Wallpaper?
Let’s break it down. At its core, peel-and-stick wallpaper is exactly what it sounds like: a decorative wall covering with a self-adhesive backing. Think of it as a giant, high-quality, and beautifully designed sticker for your walls. Unlike its traditional counterpart, it requires no messy paste, no water trays, and no specialized tools for mixing adhesives. You simply peel off the backing paper and apply it directly to your surface.
The real magic lies in its temporary nature. When you’re ready for a change or it’s time to move out, you can gently peel it off the wall, often without leaving any sticky residue or damaging the paint underneath. This makes it an ideal solution for renters, dorm rooms, or anyone who loves to frequently update their decor.
But how does it really stack up against the wallpaper our parents used? Here’s a clear comparison.
| Feature | Peel-and-Stick Wallpaper | Traditional Wallpaper |
| Application | Self-adhesive; peel off backing and apply. | Requires external paste, booking, and soaking. |
| Tools Needed | Smoothing tool, utility knife, measuring tape. | Paste brush, seam roller, water tray, sponges. |
| Mess Factor | Very low; no water or paste involved. | High; paste can get on floors and furniture. |
| Permanence | Temporary and easily removable. | Permanent; difficult and messy to remove. |
| Skill Level | Beginner-friendly; great for DIY projects. | Intermediate to professional; requires precision. |
| Best For | Renters, accent walls, furniture upcycling. | Homeowners, long-term design installations. |
The Many Faces of Removable Wallpaper: Beyond the Accent Wall
The most common use for peel-and-stick wallpaper is the accent wall, and for good reason—it creates a powerful focal point. But its versatility extends far beyond that. With a little creativity, you can use it to upgrade almost any surface in your home.
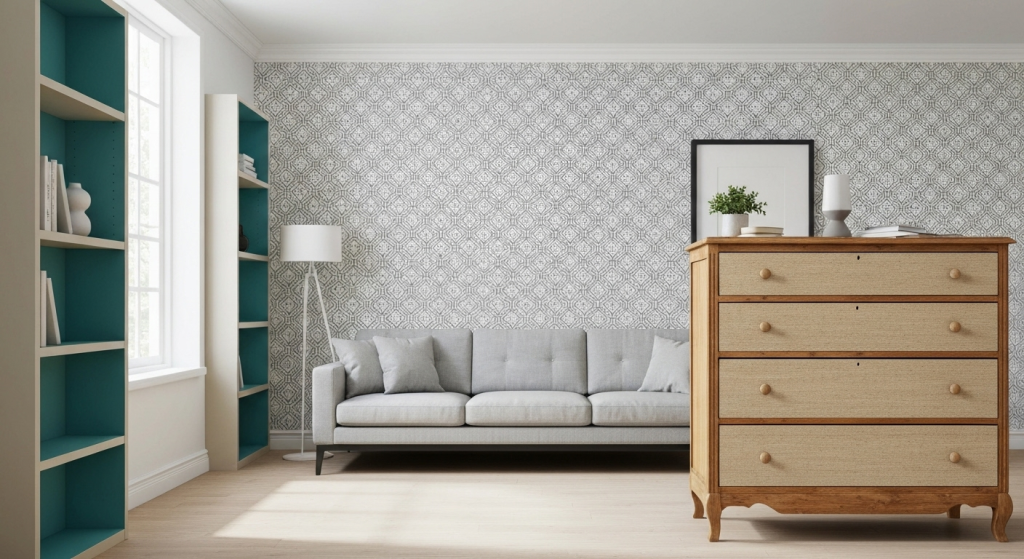
The Classic Accent Wall
Creating a feature wall is the perfect entry-level project. It instantly draws the eye and adds depth and character to a room without overwhelming the space.
- Why it works: It’s a low-commitment way to experiment with bold patterns or colors you wouldn’t use on all four walls.
- Pro Tip: Choose the wall you see first when you enter the room, or the wall behind your bed or sofa. This naturally creates a focal point. For a recent project in a small apartment, we used a vertical stripe pattern behind the couch to make the ceiling feel taller. The effect was immediate and dramatic.
Bookshelf and Cabinet Makeovers
Have a plain, boring bookshelf or a dated glass-front cabinet? The backing of these pieces is a prime canvas for a pop of personality.
- How to do it: Carefully measure the back panel of each shelf section. Cut your wallpaper to size and apply it. This simple touch transforms a generic piece of furniture into a custom, high-end-looking item.
- Experience-Based Example: I once helped a friend update her dark wood kitchen cabinets that she couldn’t afford to replace. We removed the doors, painted the frames white, and applied a bright, cheerful lemon-print peel-and-stick wallpaper to the back interior wall of the cabinets. It made the entire kitchen feel brighter and more personal for under $50.
Upcycling Furniture with a Fresh Face
That old dresser, plain coffee table, or simple IKEA nightstand can get a second life with removable wallpaper. You can cover the drawer fronts, the tabletop, or even the sides for a completely new look.
- Benefits: This is a fantastic way to hide scratches or imperfections on old furniture. It’s also much easier and less messy than sanding and painting.
- What this really means is: You can coordinate your furniture with your walls or create a standalone statement piece. Imagine a simple white dresser with drawer fronts covered in a sophisticated navy blue grasscloth-textured wallpaper. It looks custom-made.
The Unexpected Stair Riser Surprise
Stair risers are an often-overlooked design opportunity. Applying peel-and-stick wallpaper to the vertical part of each step adds an element of surprise and whimsy to your home. You can use the same pattern on each riser or mix and match coordinating designs for a more eclectic feel. It’s a high-impact project that requires very little material.
Your Step-by-Step Guide to a Flawless Application
The thought of applying wallpaper can be intimidating, but the process for peel-and-stick is straightforward. The key to a professional-looking finish is preparation and patience. Let’s walk through it step-by-step.
Step 1: Gather Your Tools
You don’t need a professional’s toolkit, but having the right items on hand will make the job much smoother.
- A measuring tape: For accurate measurements.
- A pencil: For marking your lines.
- A straight edge or level: To ensure your first piece is perfectly straight. This is crucial!
- A utility knife with a sharp blade: For clean cuts around outlets and trim.
- A plastic smoothing tool (squeegee): To press out air bubbles.
- A clean, damp cloth: For wiping down the wall.
Step 2: Prepare Your Surface
This is the most important step for both a smooth application and easy removal later on. Do not skip this!
- Clean the Wall: Wipe the surface with a damp cloth or a mixture of water and mild soap to remove any dust, grime, or oils. Let it dry completely for at least 24 hours.
- Check the Paint: Peel-and-stick wallpaper adheres best to surfaces painted with a satin or semi-gloss finish. Matte or flat paints can sometimes bond with the adhesive, making removal more difficult. If your wall has a matte finish, consider applying a coat of primer first.
- Avoid Textured Surfaces: For the best results, your wall should be as smooth as possible. The wallpaper will have trouble adhering to heavily textured walls (like “popcorn” or stucco) and the texture will show through.
Step 3: Measure Twice, Cut Once
Take a deep breath. A little careful measuring now saves a lot of headaches later.
- Measure the height of your wall.
- Roll out your wallpaper and measure a piece that is 4-6 inches longer than your wall height. This extra length gives you some wiggle room for trimming at the top and bottom for a perfect fit.
- If your wallpaper has a repeating pattern, lay your next piece beside the first one and align the pattern before you cut it. This ensures a seamless look from one panel to the next.
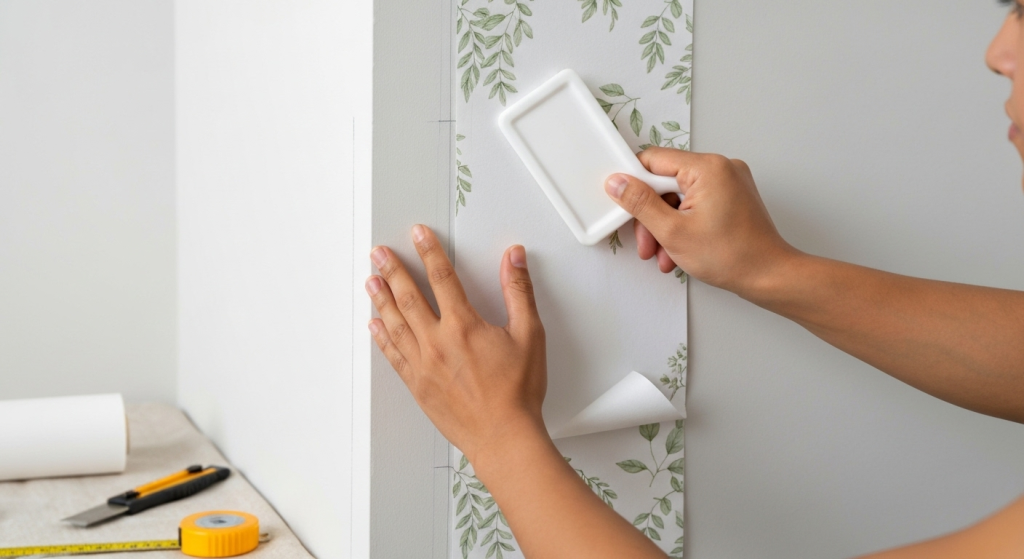
Step 4: The Application Process
Here’s where the transformation happens. Work slowly and methodically.
- Draw a Guideline: Use your level and pencil to draw a faint, perfectly vertical line from the ceiling down, about one inch less than the width of your wallpaper roll from the corner. This will be your guide for the first piece. Do not trust the corner of your wall to be perfectly straight!
- Peel the Top: Start at the top of the wall. Peel back about 12 inches of the backing paper. Fold the backing paper down so it’s out of the way.
- Align and Stick: Align the top edge of your wallpaper with the ceiling, leaving about 2-3 inches of excess. Line up the side of the paper with your plumb line.
- Smooth It Out: Using your plastic smoothing tool, work from the center out to the edges, pressing the wallpaper firmly to the wall. This motion pushes air bubbles to the side.
- Continue Downward: Slowly pull the backing paper down another foot or so with one hand while you continue to smooth the wallpaper with the other hand. Continue this process until you reach the bottom.
- Line Up the Next Panel: For the second piece, slightly overlap its edge with the first piece (most brands recommend a 1/8 to 1/4 inch overlap) to hide the seam and prevent gaps if the paper shrinks. Carefully match the pattern as you go.
Step 5: Finishing Touches
You’re almost there!
- Trim the Excess: Once a panel is fully applied, use your straight edge and a sharp utility knife to carefully trim the excess wallpaper at the ceiling and baseboard.
- Work Around Obstacles: For outlets or light switches, turn off the power first. Apply the wallpaper directly over the outlet, then use your utility knife to carefully cut an ‘X’ over the opening. Trim away the flaps and screw the faceplate back on over the wallpaper.
Troubleshooting Common Issues: Bye-Bye Bubbles and Wrinkles
Even with careful application, you might run into a few minor issues. The good news is that they are almost always fixable.
| Problem | Cause | Solution |
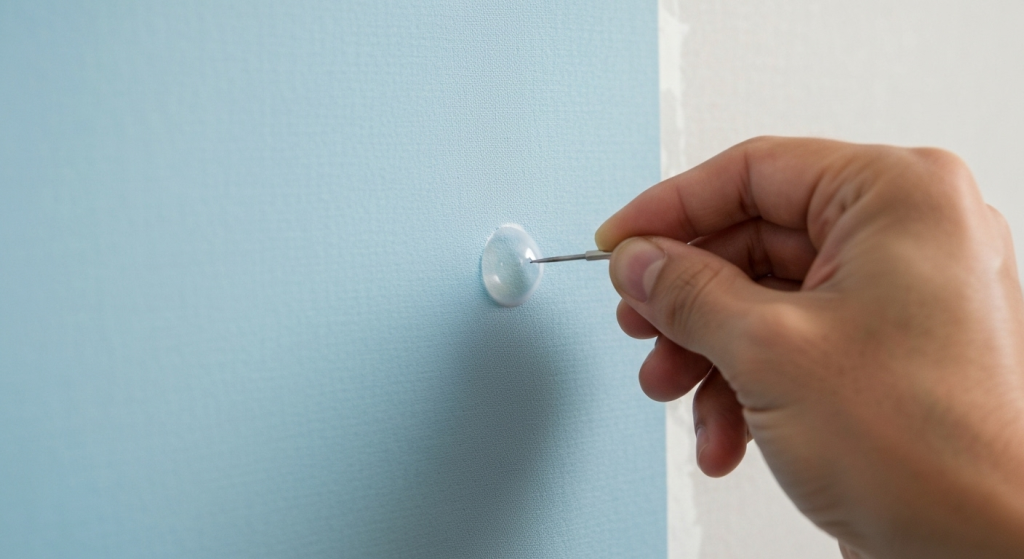
| Air Bubbles | Trapped air during application. | For small bubbles, use a pin or the tip of your utility knife to poke a tiny hole in the center. Gently press the air out toward the hole with your smoother. |
| Misaligned Pattern | Rushing the application or not using a guideline. | This is where peel-and-stick shines! Gently and slowly peel the panel off the wall and reapply it. Don’t pull too hard or you might stretch the material. |
| Peeling Edges | The wall was not properly cleaned or is slightly textured. | Try running your smoothing tool firmly over the edge again. For a persistent edge, a tiny dab of wallpaper seam adhesive can be used, but test it in an inconspicuous spot first. |
| Wrinkles/Creases | The paper was not smoothed evenly from the center out. | Gently lift the wrinkled section of the wallpaper and re-smooth it, applying even pressure from the middle outwards. |
The Grand Finale: Easy and Damage-Free Removal
When it’s time for a change, the removal process is just as simple as the application. This is the feature that makes it so perfect for temporary spaces.
- Start at a Corner: Find a top corner of a panel and gently pry it away from the wall with your fingernail.
- Pull Slowly: Once you have a good grip, pull the wallpaper downward at a 45-degree angle. Don’t rush it—a slow, steady pull is most effective and least likely to cause damage.
- Use a Little Heat (If Needed): If you encounter a stubborn spot, a hairdryer on a low heat setting can help. Gently warm the section for about 15-20 seconds to soften the adhesive, then continue peeling.
- Wipe Down the Wall: After the wallpaper is removed, there may be a faint residue left behind. This can usually be wiped away with a damp cloth and a little mild soap.
Frequently Asked Questions (FAQs)
1. Can I use peel-and-stick wallpaper in a bathroom or kitchen?
Yes, you can! Many peel-and-stick wallpapers are made from vinyl, which is water-resistant and easy to clean. However, avoid direct contact with water, like inside a shower. It’s great for a powder room or a kitchen backsplash, as long as the area is well-ventilated to prevent moisture from getting behind the seams.
2. Will it really not damage my walls?
When applied to a properly prepared, well-cured wall (paint should be cured for at least 3-4 weeks), high-quality peel-and-stick wallpaper should not cause damage upon removal. The risk of damage increases on unprimed drywall, matte paint, or old, flaky paint.
3. How do I calculate how much wallpaper I need?
Measure the height and width of your wall in feet and multiply them to get the total square footage. When you buy wallpaper, the product description will list the square footage covered by one roll. Always buy about 10-15% extra to account for mistakes and pattern matching.
4. How do I clean my new wallpapered wall?
Most vinyl-based peel-and-stick wallpapers can be gently wiped down with a soft, damp cloth and a mild detergent. Avoid using abrasive cleaners or harsh chemicals, as they can damage the printed surface. Always check the manufacturer’s instructions first.
Conclusion: Your Space, Your Rules
Peel-and-stick wallpaper is more than just a decorating trend; it’s a tool of empowerment. It gives you the freedom to experiment with color, pattern, and style without the fear of long-term commitment or financial risk. Whether you’re creating a bold accent wall, reviving an old piece of furniture, or adding a hidden pop of color to a bookshelf, the possibilities are limited only by your imagination. So go ahead, unroll that new pattern, and start creating a space that feels uniquely and beautifully yours.